Step-by-Step Instructions
Prepare the Plans
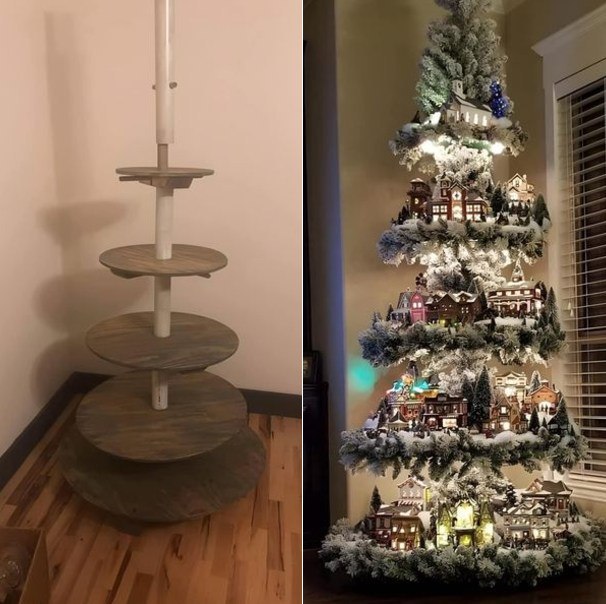
Once you have downloaded your plans from Mazies Crafts, carefully review the instructions. The plans will guide you through the measurements and the assembly process, so it’s important to follow them closely for the best results.
Cut the Wood
Using a saw, cut the wooden boards into the required shapes for the base and tiers. Each tier should be sized to hold your Christmas villages. You can adjust the measurements based on how many villages you plan to display.
Assemble the Structure
Start by assembling the tree trunk and base. Attach each tier using screws or nails. Be sure to space them evenly, so each level will be stable and balanced when it’s time to place your villages on them.
Sanding and Finishing
Once the structure is assembled, use sandpaper to smooth any rough edges. After sanding, you can paint or stain the tree to match your holiday theme. Consider using a wood finish that enhances the natural look, or opt for festive colors like red, green, or gold.
Add Decorations
continued on the next page