Millions of people don’t know this secret!! Put the cap of a beer bottle on a drill
Who knew that a simple beer cap could become a powerful tool? What seemed to be a simple waste, actually hides a trick that has surprised millions of people around the world.
This ingenious, inexpensive homemade method can help you sand, polish, and do small DIY jobs with the help of a power drill and metal cap. Here’s how to take advantage of this trick step by step.
Incredible! Put a beer cap in a drill
🧰 Materials Needed
- 1 beer bottle cap (metal)
- 1 small screw with nut (going through the center of the cap)
- 1 drill bit or adapter
- 1 small piece of sandpaper or abrasive sponge
- Electric Drill
🔧 Steps to follow
- Preparing the lid
Clean the lid thoroughly and, if necessary, straighten its edges to avoid irregularities. - Drilling the center
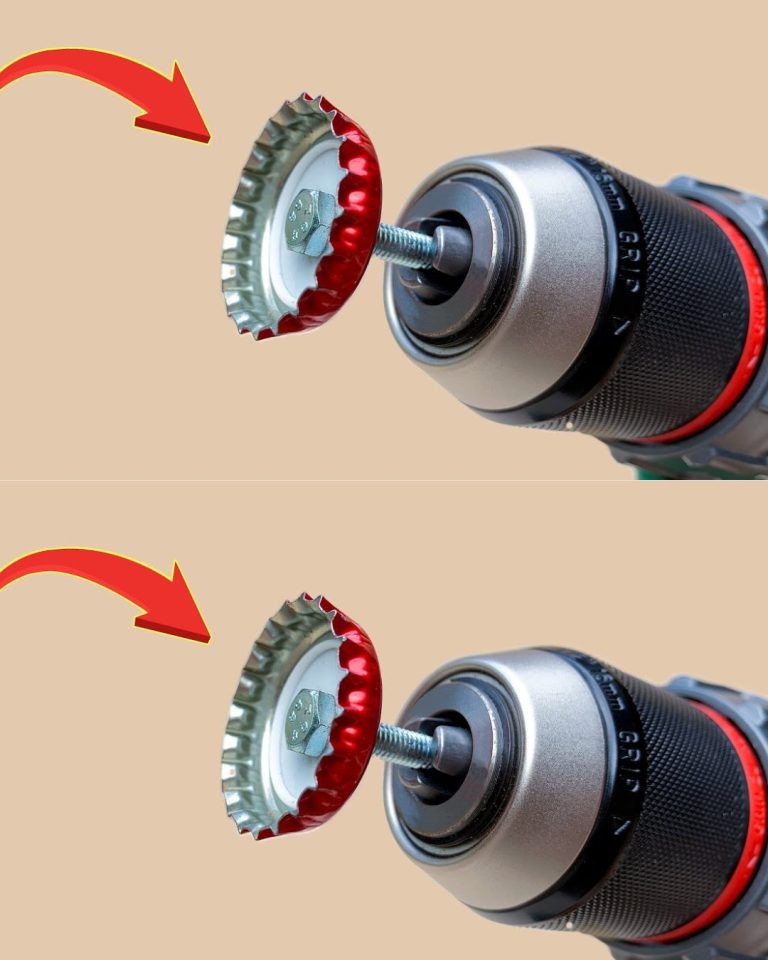
Make a small hole in the center of the lid. If you already have one, enlarge it enough for the screw to go through. - Screw
Mounting Insert the screw through the hole in the lid and tighten a nut on the opposite side to secure it firmly. - Placement on the drill
Clamp the screw into the drill jaw as if it were a normal drill bit. - Using the Homemade Attachment
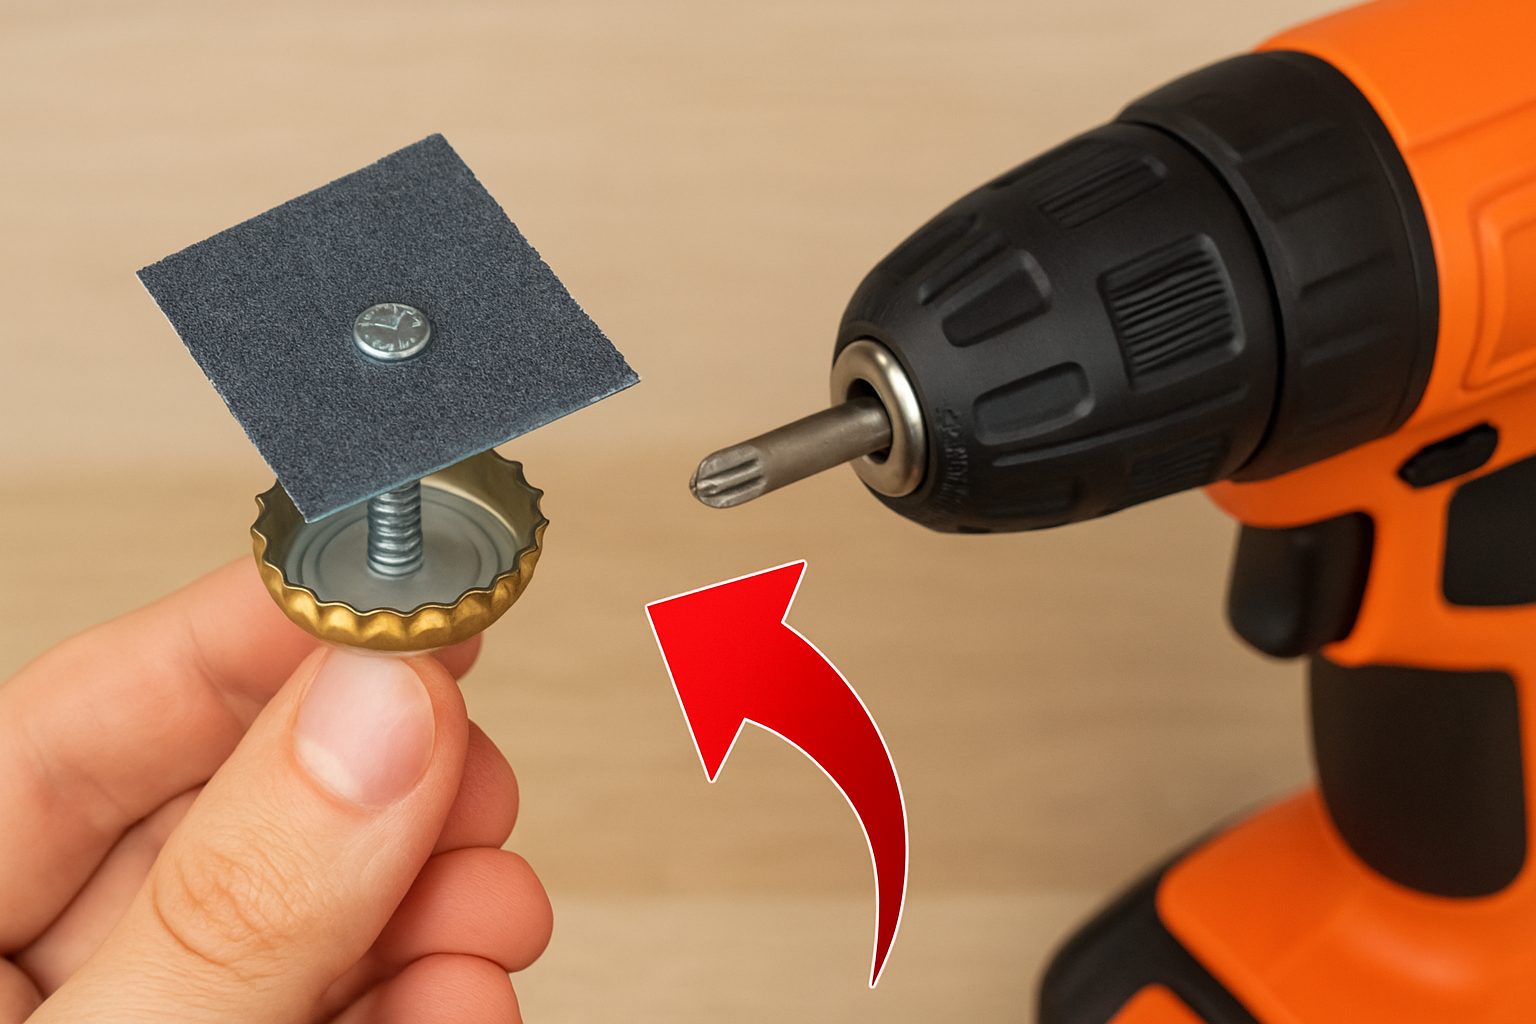
You can hot glue a piece of sandpaper, abrasive sponge, or even an additional plastic lid if you want to perform other functions such as cleaning or polishing. - Turn on and test
With the drill at low speed, make smooth movements on the surface you want to work on.
💡 Useful tips
- Make sure the lid is well centered to avoid vibrations that could damage the drill or surface.
- Wear gloves and goggles, as metal can spark or come off if not properly secured.
- You can adapt this trick to different tasks: polishing metals, cleaning rust, sanding wood, etc.
- If you use sandpaper, change the piece regularly to maintain efficiency.
- Do not use this method on delicate or electronic surfaces.